This page contains all the FAQ questions in one place. Please make sure to check the list before requesting support in the #mc-support channel.
How do I join the server on Java
/Bedrock?Joining The Server
Question: How do I join the server on Java / Bedrock?
Joining the EmpyrorMC server is a simple process.
Minecraft Java
- Go to “Multiplayer”
- Press “Add Server”
- Enter a server name of your liking and enter the server address of “mc.empyror.com”
- Press “Done” and then join the server.
- Follow the Discord linking instructions that’ll be presented to you and you’ll have access!
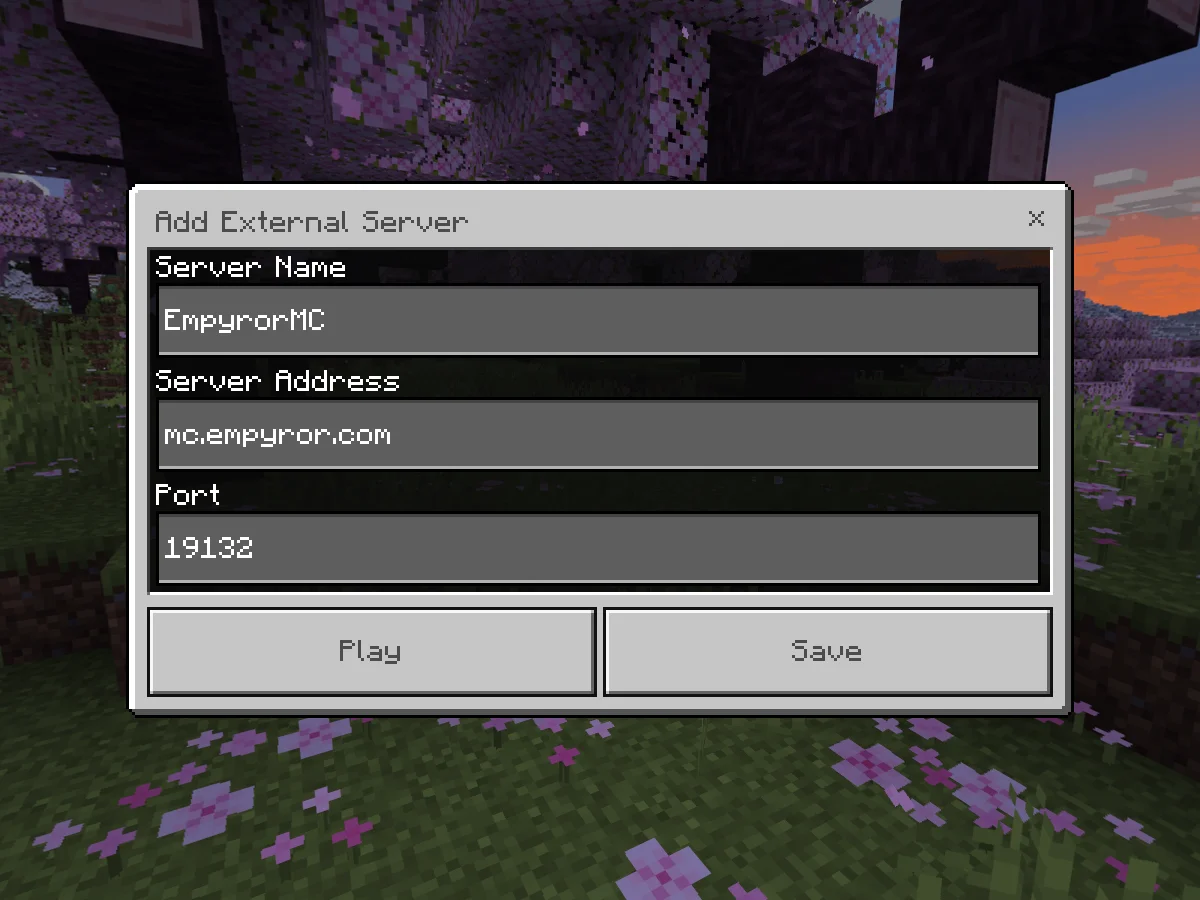
Minecraft Bedrock
- Go to “Play”
- Press “Servers”
- Scroll to the bottom of the server list and press “Add Server”
- Enter a server name of your liking and enter the server address of “mc.empyror.com” and make sure the port the port is “19132”
- Press “Save” and then join the server!
- Follow the Discord linking instructions that’ll be presented to you and you’ll have access!
Link to original

Where can I find the server rules?
Rules
Question: Where can I find the server rules?
Discord Rules
- You can find the Discord server rules in the
#ruleschannel.Minecraft Rules
- You can view the Minecraft server rules by running the
/rulescommand in chat or by checking the hologram at/spawn.
Both the Discord rules AND the Minecraft server rules apply.
Some punishments received on the Minecraft server will also extend to the Discord server and vice versa.Link to originalExample
- Harassing a player in chat on the Minecraft server will lead to a 2-4 hour mute (depending on severity) on the MC server, as well as the Discord server.
How do I link my Discord account in Minecraft to receive my roles?
Discord Linking
Question: How do I link my Discord account in Minecraft to receive my roles?
The process is automated and can be done through the following steps:
- Join the Minecraft server and you’ll receive a code on your screen.
- Send the code shown on the screen to the EmpyrorMC bot on Discord.
- After verifying, you can join the Minecraft server!
Link to originalWhat do the roles do?
- At the moment, the custom in-game roles give you a custom title in the chat of the Minecraft server.
- Some roles, like the
Supporter role, give you access to the/nickcommand, which allows you to change your name.- We’ll try to add more cosmetic features for higher roles in the future.
How do I protect my builds?
/How do I use the claim plugin?Claim Plugin
Question: How do I protect my builds? / How do I use the claim plugin?
We’re using the GriefPrevention claim plugin on our server at the moment.
This plugin allows you to claim areas to fully secure them and choose which parts of your claim you’d like to share with specific players.Related Links:
Claim Plugin Essentials
Start by using the
/kit claimcommand in chat.
- This will provide you with 3 items, being the:
- Claim Shovel
- GriefPrevention simple guide book
- A stick
How to See Claim Blocks
- You can see how many claim blocks you have by holding out the Claim Shovel, which will display the amount in chat.
How to Claim Land
Claiming land is done through the Claim Shovel.
- Select the Claim Shovel from your hotbar.
- Right-click a block with it to set your first claim corner. It will be indicated by a diamond block.
- Decide where your claim will end, and right click the block to set the second claim corner.
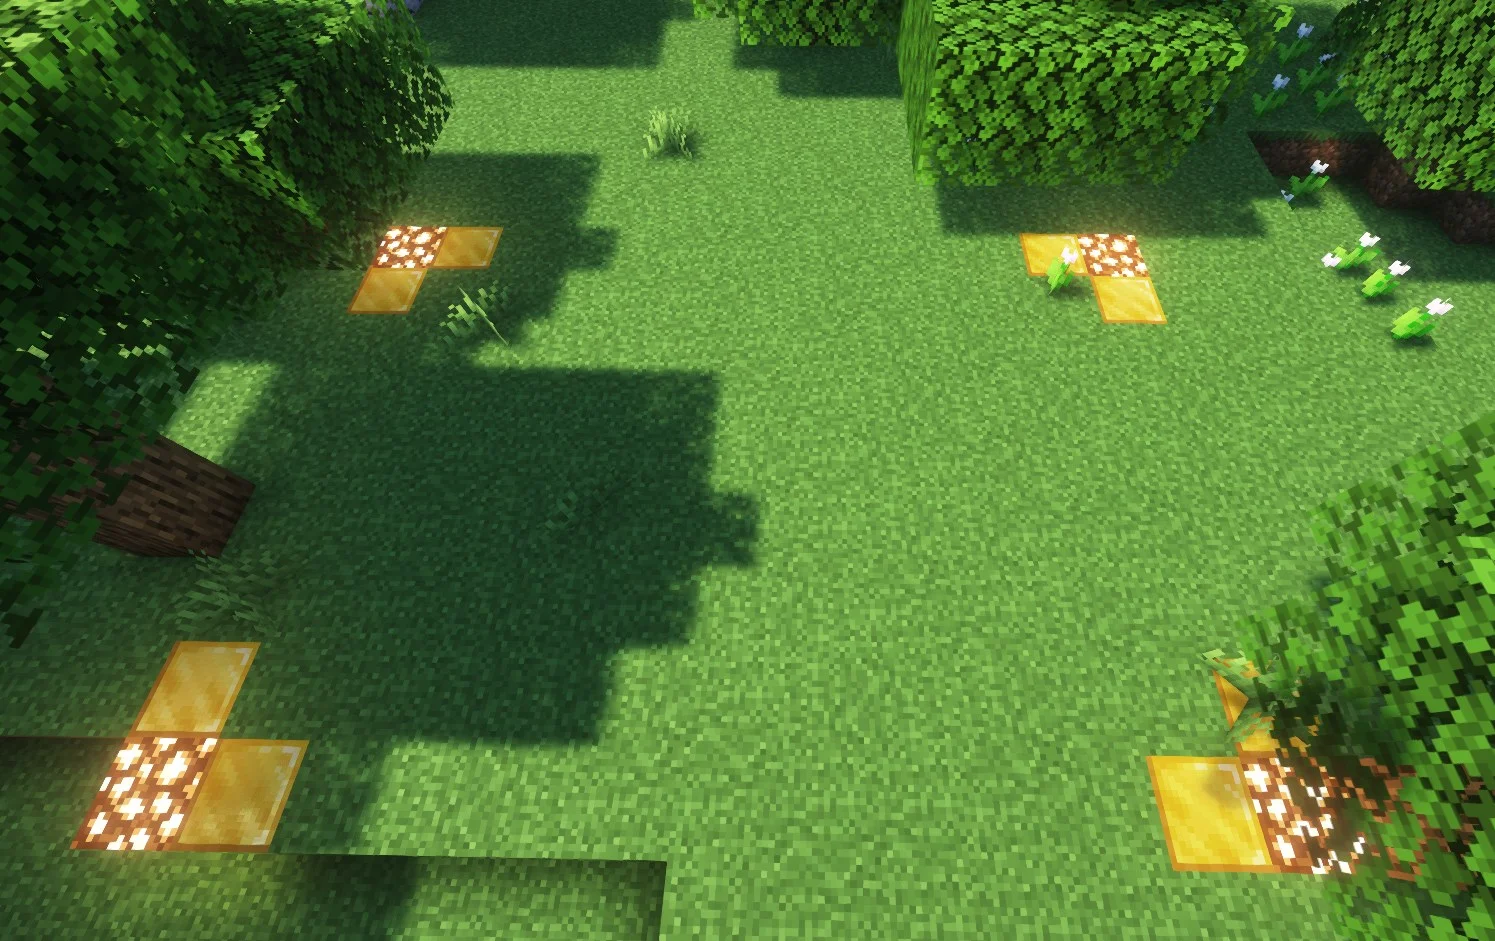
- In the end, you’ll be able to see your claim parameters displayed as glowstone and gold blocks, they’ll look like this:
Stick Usage
- The stick can be used to inspect blocks and see which claim they belong to.
- This can be done by right-clicking blocks with the stick.
Automatic Chest Claiming
- One of the features of GriefPrevention is that when you place down a chest, it’ll attempt to claim the area around it in order to prevent breakage and theft.
Basic Commands
/AbandonClaim
- Deletes the claim you’re standing in.
/AbandonAllClaims
- Deletes all of your claims.
/Trust {PLAYER}
- Gives another player permission to edit in your claim.
/UnTrust {PLAYER}
- Opposite of
/Trust. Revokes any permissions granted to a player in your claim./AccessTrust {PLAYER}
- Gives a player permission to use your buttons, levers, and beds.
/ContainerTrust {PLAYER}
- Gives a player permission to use your buttons, levers, beds, crafting gear, containers, and animals.
/TrustList {PLAYER}
- Lists the permissions for the claim you’re standing in.
/ClaimsList {PLAYER}
- Lists a player’s claims and claim block details.
/GiveClaim {PLAYER}
- Gives your claimed area to another player.
/Trapped
- Gets a player out of a land claim he’s trapped inside.
Link to originalFull list of commands
- You can find the full list of commands on the GriefPrevention Commands website.
How do I make trading chests?
/How do I use TradeShop?TradeShop Basics
Question: How do I make trading chests? / How do I use TradeShop?
We’ve decided to add the TradeShop plugin in order to make an easy and efficient trading system that works even when players are offline. The plugin helps us achieve that through chests which are used for trading.
Related Links
TradeShop Basics
There are two type of shops you can setup with the plugin, you can set them through commands or by specifying the shop type on the first line of a sign.
- The shop types are:
- Trade shops
- They offer a product for a specific price.
- People can only buy from this shop type.
- BiTrade (Bidirectional Trade) shops
- They offer a product for a specific price.
- People can both buy and sell from/to this shop type.
- (This means people can buy the product from you, and also sell the product to you if they’d like)
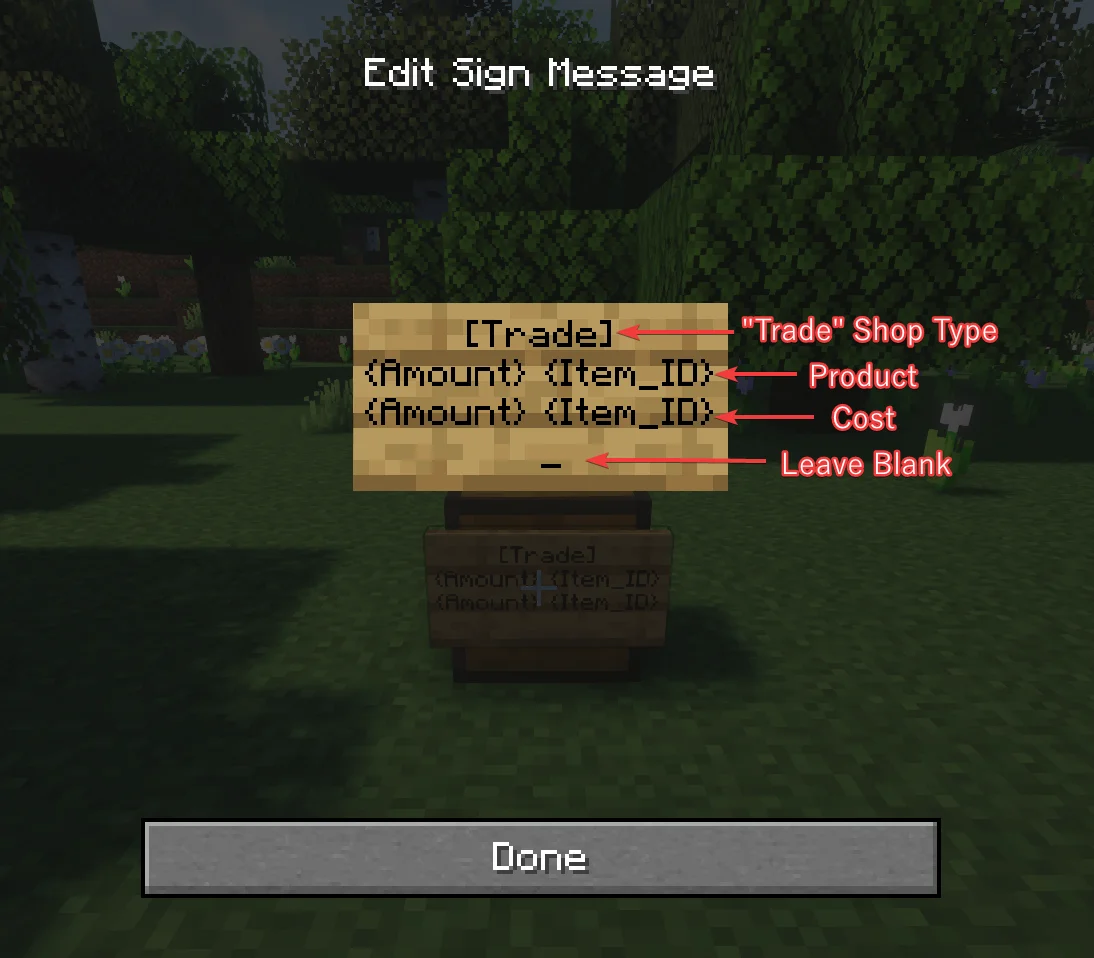
How to Setup: Trade Shops
- Start by placing down a chest.
- Put a sign that is attached to the chest which you’ll use to write down the information of your shop
[Trade]⇐ This will set the shop type to “Trade”.{Amount} {Item_ID}⇐ This will decide the product you’re selling.{Amount} {Item_ID}⇐ This will decide the cost/price of the product you’re selling.- Leave the fourth line empty and exit out of the sign editor for the shop to be established.
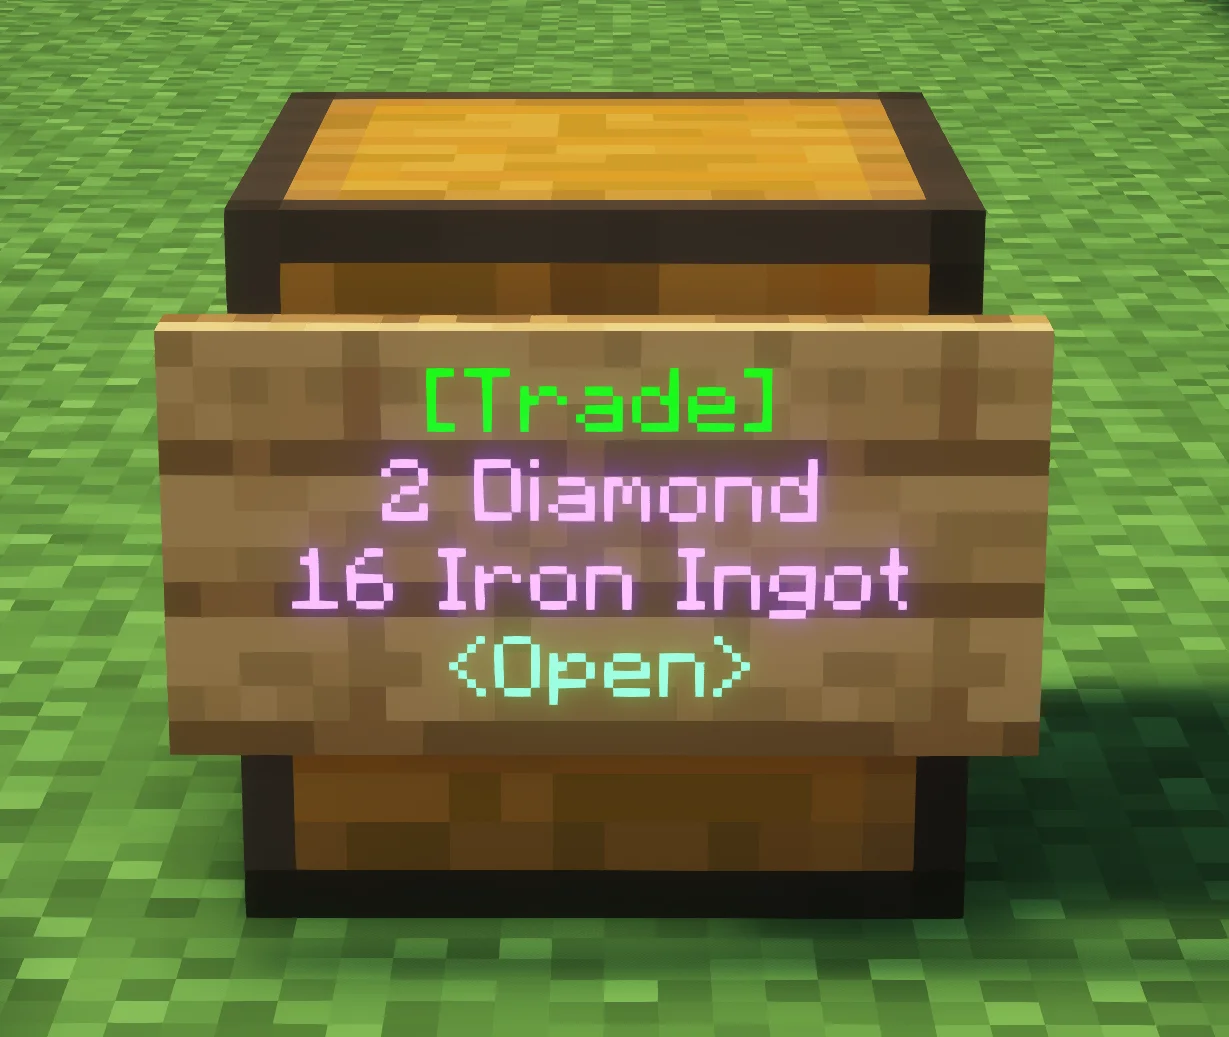
" Trade" Type Shop Example:
- Sign:
[Trade]2 Diamond16 Iron IngotThis example would give you a “Trade” shop that is offering 2 Diamonds for the price of 16 Iron Ingots. People can only buy from this shop type.
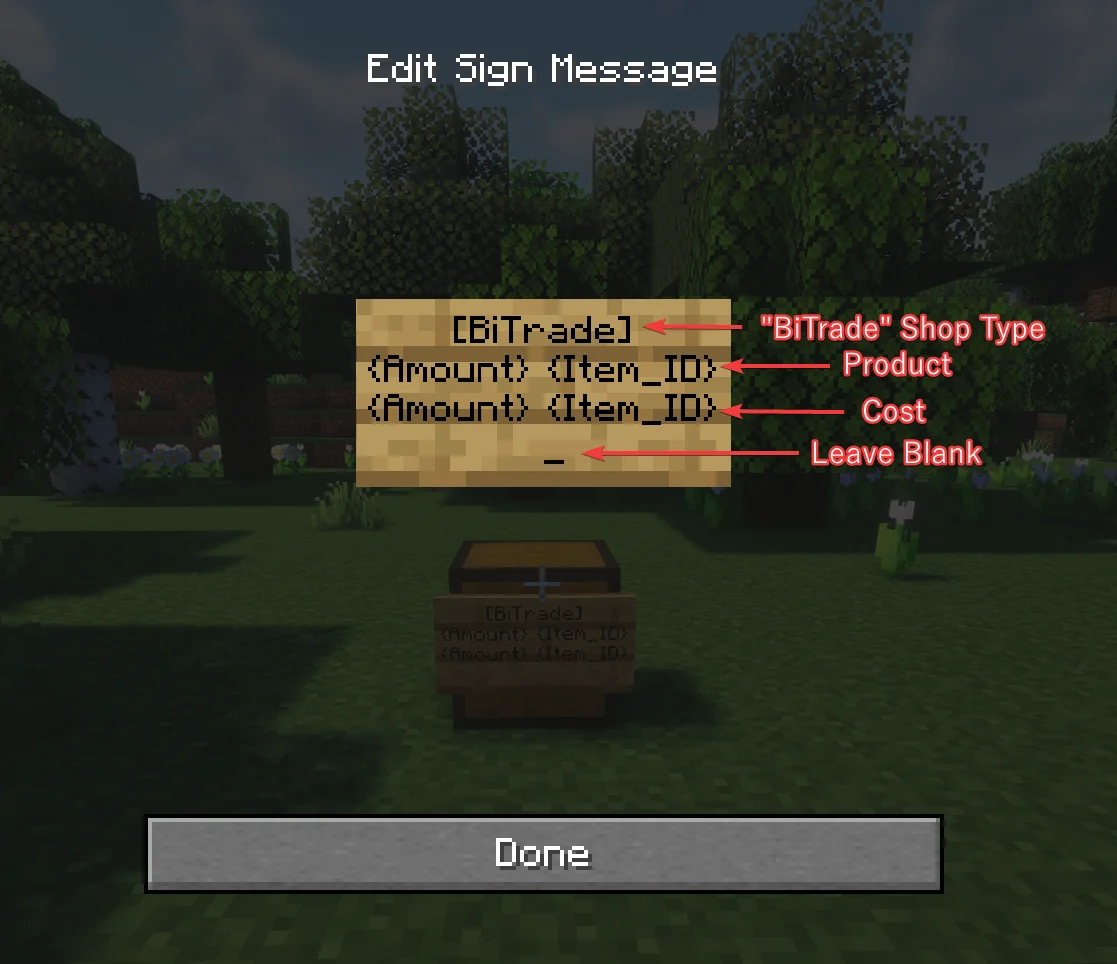
How to Setup: BiTrade Shops
- Start by placing down a chest.
- Put a sign that is attached to the chest which you’ll use to write down the information of your shop
[BiTrade]⇐ This will set the shop type to “BiTrade”.{Amount} {Item_ID}⇐ This will decide the product you’re selling.{Amount} {Item_ID}⇐ This will decide the cost/price of the product you’re selling.- Leave the fourth line empty and exit out of the sign editor for the shop to be established.
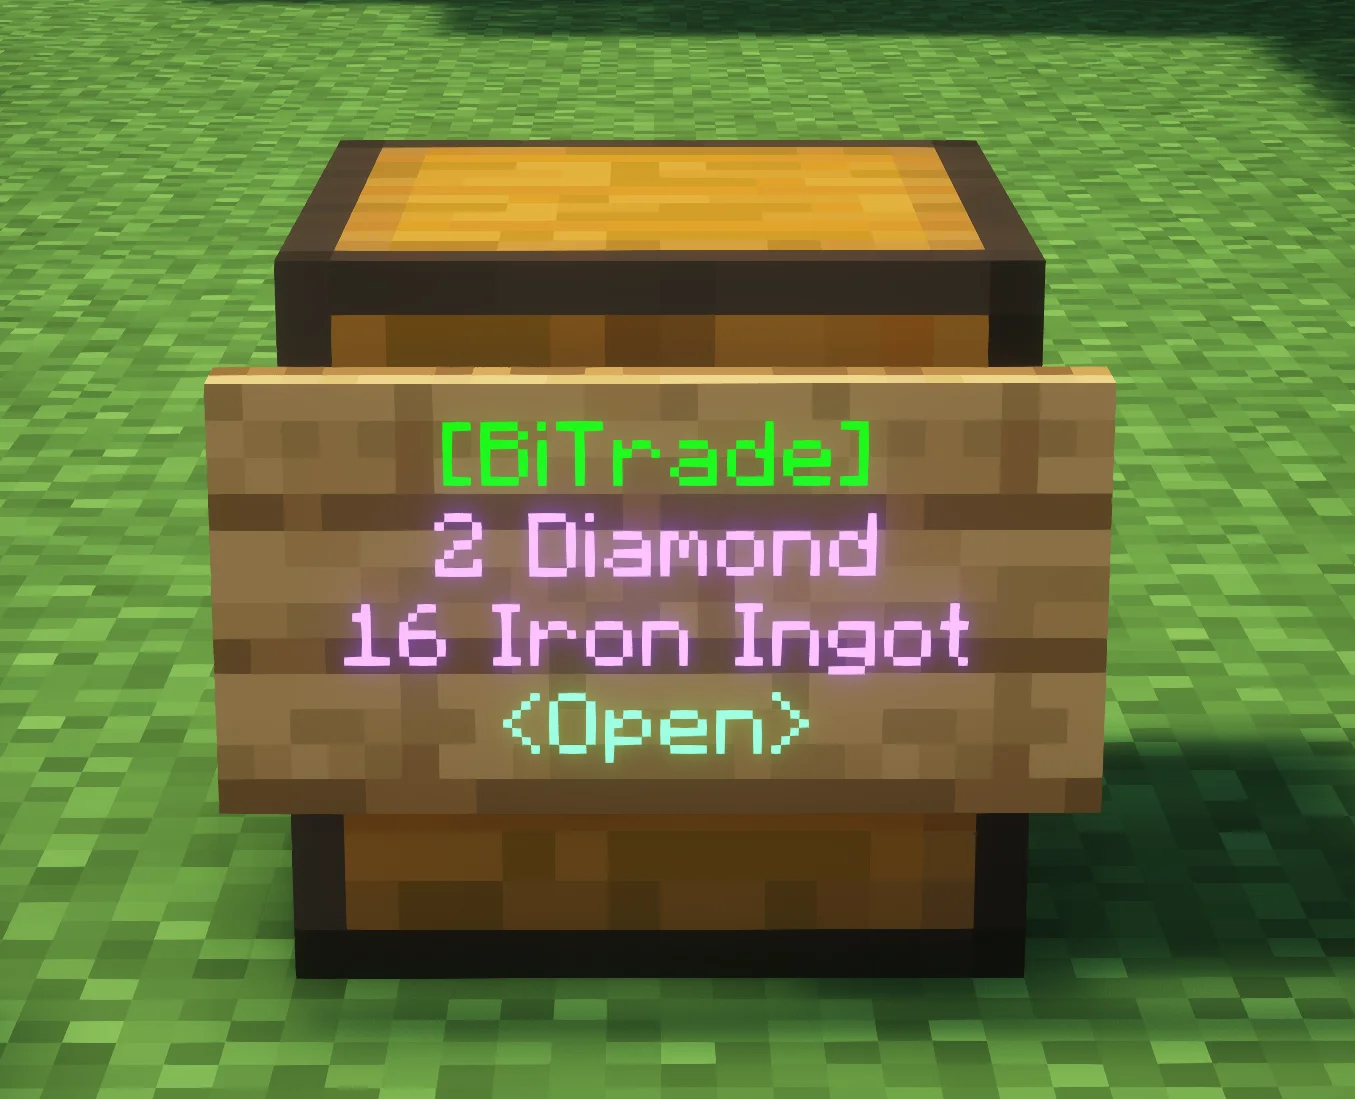
" BiTrade" Type Shop Example:
- Sign:
- [BiTrade]
- 2 Diamond
- 16 Iron Ingot
This example would give you a “BiTrade” shop that is offering 2 Diamonds for the price of 16 Iron Ingots. People can both buy and sell from/to this shop type.
Basic Commands
Other Shop Management
/TradeShop close
- This command allows the player to close a shop they are looking at if they are a user that is capable of closing it.
/TradeShop open
- This command allows the player to open a shop they are looking at if they are a user that is capable of opening it.
/TradeShop switch/TradeShop edit
- This command allows the player to open an edit GUI for the shop they are looking at. The GUI allows graphical editing of Users, Products, and Costs.
/TradeShop create
- This command allows the player to turn the sign they look at into a Trade Sign
/TradeShop createbi
- This command allows the player to turn the sign they look at into a BiTrade Sign
User Management
/TradeShop addManager {PLAYER}
- This command allows the player to add managers to a shop that they are an owner of.
/TradeShop addMember {PLAYER}
- This command allows the player to add members to a shop that they are an owner or manager of.
/TradeShop removeUser {PLAYER}
- This command allows the player remove users of a shop with a lower rank then them.
Full list of commands
- You can find the full list of commands on the TradeShop Commands website.
- By default, players have access to the following permissions:
Create,CreateBi,Edit,Info.
Extra Info: FAQ from Wiki
(?) Players cannot buy from shops. Instead they get a message about the shop being closed.
- The shop is closed to buyers. To allow for trade, look at the shop and issue the command
/tradeshop open.- Hint: to reverse this, you can close shops by using
/tradeshop close.Link to original(?) How do I add items with long names or with special metadata?
- Use the commands:
/ts addcost,setcost,addproduct,setproductwhile holding the item in your hand.
Why aren't my villagers working properly?
/How do I optimize my villagers?Villagers
Question: Why aren’t my villagers working properly? / How do I optimize my villagers?
To prevent unnecessary and excess lag on the server, we’ve opted to install a plugin called VillagerOptimizer that changes how villagers function and behave depending on specific conditions.
This plugin may cause some annoyances sometimes, but it is necessary to keep the server running well as it minimizes huge villager lag. It does also add some new cool features like the ability to leash villagers, disabling damage from all sources (except zombies), and disabling their sleep cycle while in the ‘unoptimized’ state.
Basic Info
This plugin will disable trades with any villagers as long as they’re in an unoptimized state, where their AI is working.
- Optimized villagers will have their AI disabled and will glow white.
To optimize villagers, you currently have two different methods available:
- Optimization with blocks (Recommended)
- Optimization with name tags (Not recommended)
Optimization delay
- There is a 10 minute cooldown on optimizing
/unoptimizing villagers.- This is necessary and was done to prevent exploits.
1. Optimization with blocks (Recommended)
The second way of optimizing villagers is to use blocks.
- Using blocks is a very simple and clear way of optimizing villagers and is very accessible.
- To optimize villagers with blocks, you’ll have to follow these steps:
- Have one of the optimization blocks.
- Place it within a 2-block radius of the villager(s) that you’d like to have optimized.
- The currently available optimization blocks are:
- Lapis Block
- Glowstone
- Iron Block
Why is this recommended?
- We found this to be the easiest and most straightforward way of optimizing your villagers.
- It is also more resistant to player griefing.
2. Optimization with name tags (Not recommended)
The first way of optimizing villagers is to use name tags.
- Using name tags is a clear process, all you’ll need to do is:
- Have a name tag.
- Rename it to one of the optimization words.
- Apply it to the villagers that you’d like to have optimized.
- The currently available optimization words are:
- Optimize
- DisableAI
- noAI
Why is this not recommended?
- Based on the fact that name tags CANNOT be removed once they’ve been placed on a creature, we’ve decided to give players access to the
/unoptimize {RADIUS}command, so that they can clear name tags off of villagers.- However, this comes with a downside, as this allows ANY player to unoptimize your villagers.
- So please, do use this method with caution.
Link to originalInfinite nametag usage
- Because we know it’s a tedious process to get name tags, we’ve made it so any name tags that have the name of an optimization word will NOT get used up once applied.
Why isn't my skin working on Bedrock?
/How do I change my skin on the server?Skin Changer
Question: Why isn’t my skin working on Bedrock? / How do I change my skin on the server?
Due to some limitations with how Bedrock works, Bedrock skins won’t render properly on the Minecraft server.
Link to original
- As a fix to this issue, we have added a skin changer plugin that allows you to change your own skin to any other player or use a skin that’s available online.
- You can access this feature with the
/skincommand.
How do I enable PvP?
PvP Toggle
Question: How do I enable PvP?
PvP is disabled by default on EmpyrorMC.
Link to original
- However, you can choose to toggle it on with the
/pvp togglecommand.- Both parties need to have PvP toggled on for it to function and work correctly.
- People with PvP enabled will be indicated by a red circle around them.
How can I teleport to somewhere far away?
RTP
Question: How can I teleport to somewhere far away?
You can use the
Link to original/rtpwhich will teleport you to a random location on the server. The Minecraft world is pretty big so you should be able to find undiscovered locations.
Are the Nether & End enabled on the server?
Nether & End
Question: Are the Nether & End enabled on the server?
The Nether and End are currently enabled on the server.
Link to originalWatch out!
The Nether & End will be reset occasionally, so it’s advised NOT to build any structures you’d like to keep there.